A Home Lab is Where the Heart Is
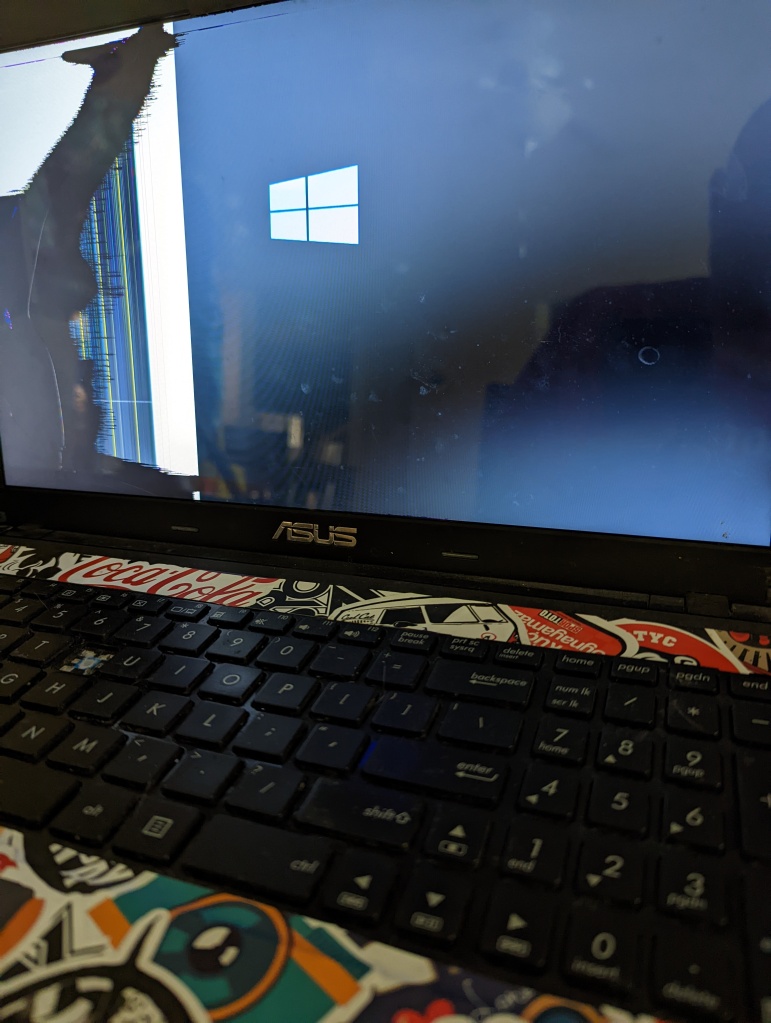
A home lab can be many things. At its core, it is a made up of the device or devices that you use practice and hone your IT skills. The important part is that you use it to learn. You can get an old laptop, install a Linux distro of your choice and just learn; learn Linux; install Wireshark and packet tracer to learn networking; install DVWA and learn penetration testing. This is one of the laptops I still use to practice with. The screen and keyboard were broken and it cost $20. With the addition of a $30 SSD, a keyboard and old monitor I had sitting in a closet, it works fine for running Kali or being the victim when I practice WIFI attacks.
Home Lab Mk3
This and many articles to follow will cover the third iteration of my cyber security home lab. For the hardware I am using some second-hand enterprise servers. I picked up a pair of HP DL380 Gen 8 Servers about two years ago for $600. I have used these to run services for my home as well as for my cybersecurity lab. I have also picked up a few different pieces of enterprise switches and routers for $40 to $120 each. Before you run out and buy enterprise gear, do some research, define your needs and your price range. I have seen plenty of posts for a whole pile of equipment in a rack for $1000 but with further research you find that it is worth the cost of scrap metal because it is so old. You could still probably learn a lot on it, but there are better options to be had.
For software, I am running VMWare ESXi on the servers and VMWare Workstation Pro on my laptop. There is a cost for this software, but there are other free options. Check the Tools & Resources section from some other virtualization ideas.
Lab Design
This lab will be run in a vlan and subnet that I have segregated from the rest of my home lab with my main router’s firewall rules. I am not going to get into the design of my overall network, but from the perspective of a machine in the lab, there is no other network. Traffic will make hops through a virtual switch, a virtual router, and a physical switch, before reaching the gateway router. This network segment will be broken into three subnets; a DMZ, a management network, and a client network. NOTE! “management network” is probably a bad name choice because that is used to refer to an out of band network that access the management interfaces of network equipment.
For now, the DMZ will host two servers, an instance of Metasploitable 2 and a WordPress site from TurnKey Linux. The management network will host a Windows Server 2019 Active Directory Domain Controller and an instance of Security Onion to act as a SIEM. Finally, the client network will include various Windows versions from XP to 10. I will most likely add a mail server as I continue to build this out. All of these networks will be defined by a PFsense machine that will act as the Firewall and router for this network.
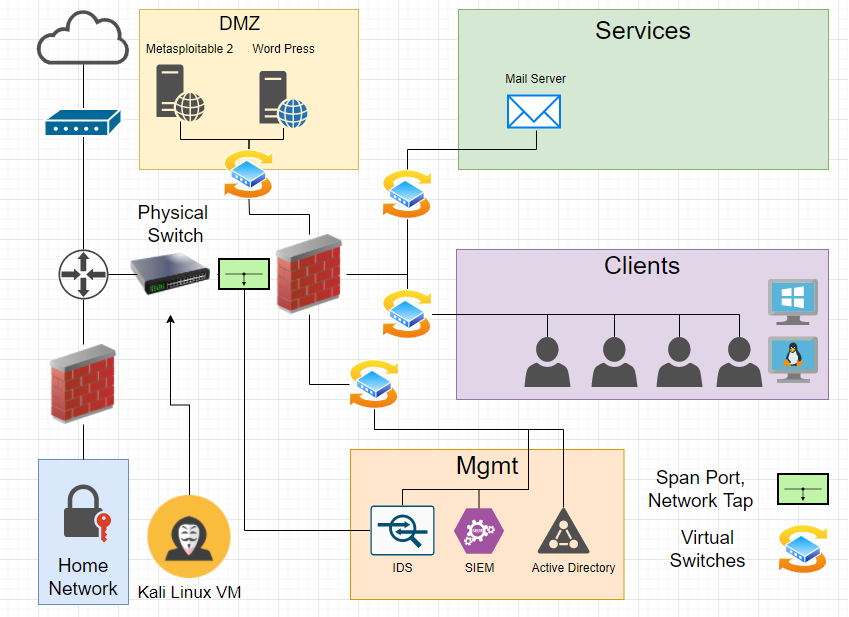
This network diagram that shows the several subnets and their organization. A network tap or Span Port will be installed on the PFsense machine and connect to Security Onion to have access to all of the external network traffic. At some point in the future I would like to build something similar on a web hosted VPS and expose the DMZ directly to the internet but for now I am content to hide this behind two firewalls.
I will be using a Kali Linux VM as my attacking machine from an external network location. I have also installed a SIFT Workstation that comes loaded with a wide variety of forensic analysis tools. I don’t have any experience with SIFT yet so I am looking forward to learning more on that front.


Leave a comment