
DISCLAMER: The lead image and text of this article were created with the assistance of OpenAI tools. The image was initially generated using DALL-E and later modified for contrast, with additional text added. The article was written by the author and then processed through ChatGPT for suggestions on style and formatting. While I’m uncertain if I will continue utilizing AI assistance for future articles, I am committed to transparently disclosing any involvement of AI in my articles and projects.
Create a VM and Install Windows Server 2019
Let’s begin by setting up a virtual machine (VM) with Windows Server 2019, which will act as the Domain Controller for our Active Directory Forest. You can find evaluation versions of Microsoft products available [here](link to Microsoft Products page). For this setup, I allocated 4 cores, 4GB of memory, and 64GB of storage, and selected the appropriate .iso file. Power on the VM and follow the installation process.
When prompted, choose the ‘Desktop Experience’ option, which installs a Graphical User Interface (GUI) on the server. While this requires additional storage and memory, it provides a more user-friendly interface, particularly for those new to working with Windows command line. I recommend using the GUI until you become familiar with the Windows command line interface.
Note: If you encounter issues sending ‘Ctrl+Alt+Del’ to the guest OS through the VMware web interface, try connecting to the server via VMware Workstation. This should allow you to send the keys and log into the server successfully.
Once logged in, navigate to the Start menu and select ‘Settings > Update & Security’ to check for updates. Let the updates download and install, then restart the machine to ensure all updates are applied.
Note: If you intend to exploit older Windows Server vulnerabilities for testing purposes, you may choose to avoid downloading the latest patches. In such cases, it might be necessary to find ISOs of older versions. I recommend keeping a copy of each ISO on your file server, labeled with a name that indicates the major and minor version number.”
Set Up Your Domain Controller
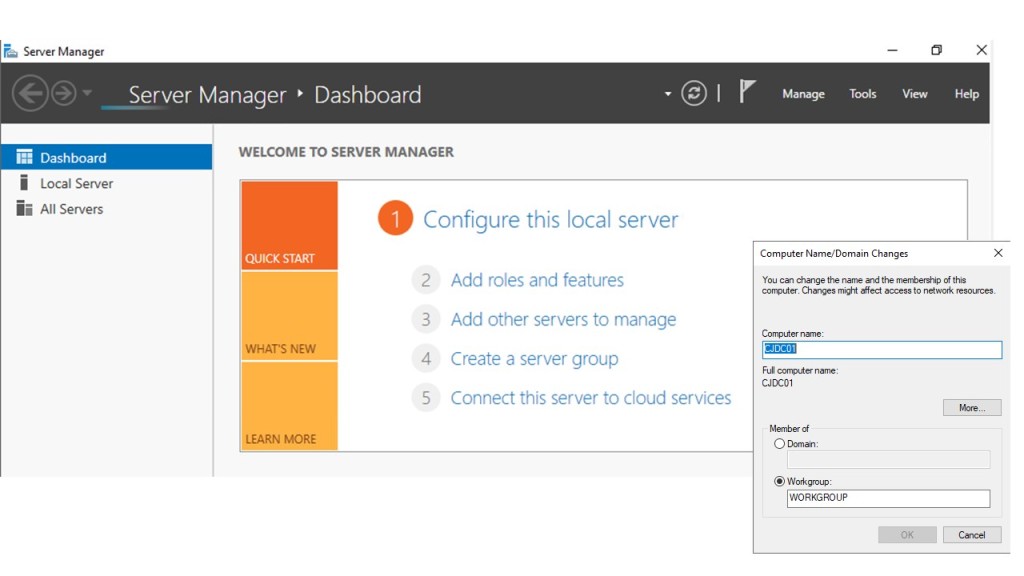
To proceed with the setup, we will first change the name of the server. Start by selecting ‘Configure this local server,’ then navigate to the computer name and click on the ‘change’ button. Changing the server’s name will help us identify it as we add more machines to the network. In this case, I chose the name ‘CJDC01‘ to represent Cyber Journey Domain Controller number one. Remember to reboot the server after making this change. You can use the PowerShell command ‘Rename-Computer -NewName "CJDC01" -Restart‘ to accomplish this.
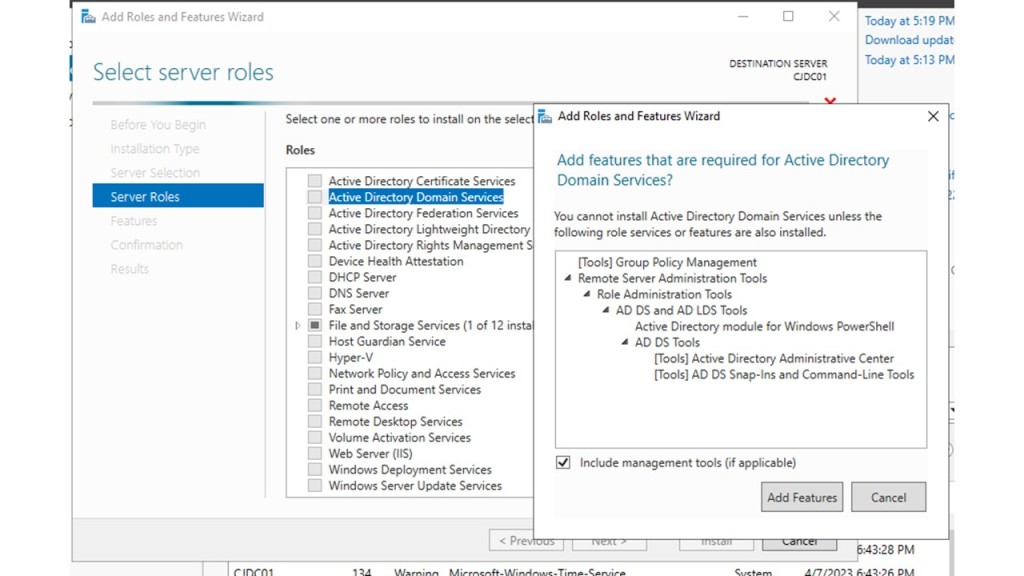
Once the server has rebooted, we can proceed to add the necessary roles for the Domain Controller to operate. Navigate to ‘Manage > Add Roles and Features > Role-based or feature-based installation,’ and select the current server. This will display a list of roles to add. Choose ‘Active Directory Domain Services,‘ ‘DHCP,’ and ‘DNS,’ then click on ‘Add Features‘ when the popup appears. Follow the subsequent prompts by clicking ‘Next’ several times and then ‘Install.’
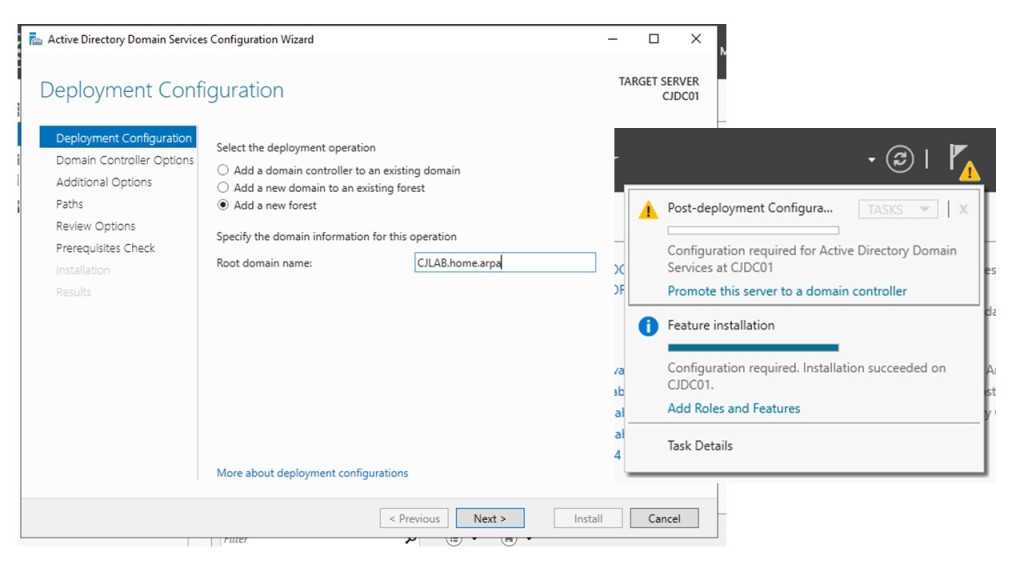
After the installation of the features, we need to complete the setup for each one. For the Domain Controller, select ‘promote this server to a domain controller.‘ Choose the radio button for ‘Add a new forest’ in the root domain name box. In my case, I selected ‘cjlab.home.arpa’ as the domain name. Proceed by clicking ‘Next’ and create a DSRM (Directory Services Restore Mode) password. Skip past the DNS delegation step and keep the default NetBIOS domain name and file locations. Finally, you will reach a ‘Review your selections’ page. Click ‘Next,’ run the prerequisite check, and then hit ‘Install.’ The system will need to reboot once the installation is complete.
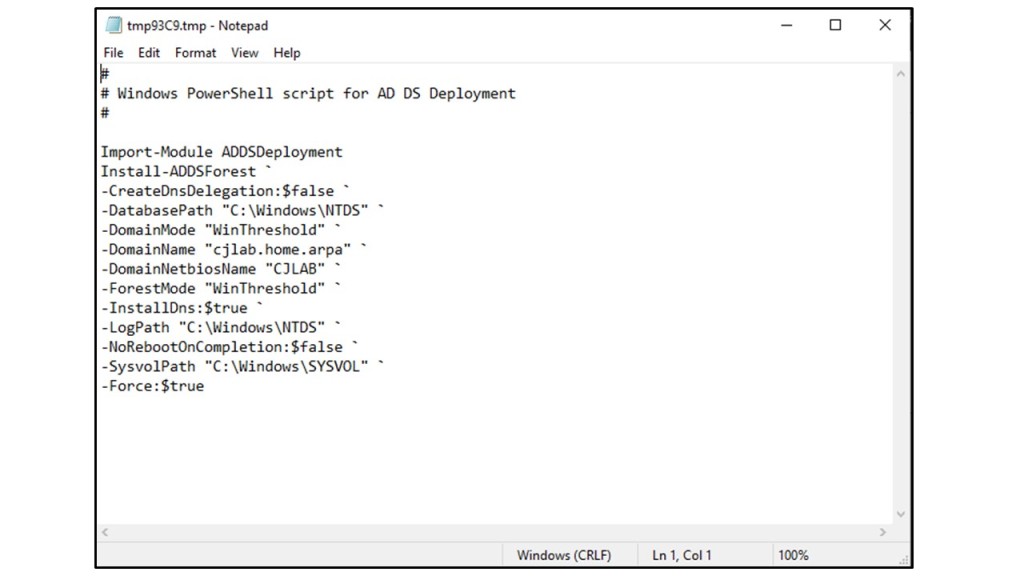
Note: On the ‘Review Selection’ page, there is a ‘View Script’ button that shows the PowerShell command used for the configuration. You can check this if you want to become familiar with the underlying PowerShell commands.
I proceeded by installing several client VMs on the same subnet, including different versions of Windows such as 10, 8, and 7. I plan to install a Windows 11 VM at a later date. During the installation process, I encountered some issues bypassing the TPM (Trusted Platform Module) check. Furthermore, I faced a DHCP issue where the client machines couldn’t find the domain controller. Additionally, while the clients did receive an IP address, they had no internet connection. Upon investigation, I discovered that the DHCP server was assigning an invalid DNS server address to the clients. This was due to a change I made when I shifted the DHCP responsibilities from my main router to the Domain Controller. To resolve the issue, I corrected the erroneous DNS server address, and all the clients successfully connected to the domain after resetting their network configurations.
Conclusion
As we conclude the initial setup of our Domain Controller, it’s important to recognize that this is just the first step in building a robust and secure infrastructure. The Domain Controller forms the foundation for our network, laying the groundwork for further expansion. In the coming articles, we will explore the deployment of web, file, and database servers, and the implementation of additional subnets. We will also delve into configuring firewalls, setting up a Security Information and Event Management (SIEM) system, and applying essential cybersecurity controls to safeguard our entire network. Stay tuned as we embark on this exciting journey to fortify our infrastructure and enhance our cybersecurity posture.


Leave a comment