Authors Notes: I used Chat GPT 3.5 to assist in writing this post. I reviewed a few recourses before I began this project. The guide on Level Effect by Will Nissler was especially helpful. I only made a few deviations from that process. Here’s a link if you want to check it out: How To Set Up Your Own Home Lab With Elk
Note: Throughout this process, i use a mixture of absolute and relative paths. Relative paths, are “relative” to your current location. Absolute paths refer back to the root directory and can be used regardless of your current location. Just ensure you are in the correct folder when using relative paths like /certs vs absolute paths like /usr/share/elasticsearch/certs.
Embarking on the installation of the Elastic Stack (Elasticsearch, Kibana, Logstash, and Filebeat) on a local VM can be a rewarding endeavor, providing robust data analysis and visualization capabilities. In this guide, I’ll walk you through the process of installing Elastic Stack on Ubuntu Server 22.04 LTS, emphasizing essential steps and configuration details. Whether you’re a system administrator, developer, or an enthusiast exploring data analytics tools, this tutorial will help you set up a powerful data processing environment.
Setting Up Ubuntu Server:
To ensure a stable and supported environment, I chose Ubuntu Server 22.04 LTS for its long-term service and security updates. During the installation, I opted for the user and computer name “elk” and enabled SSH for remote management. After installation, I updated and upgraded the system using the following commands:
sudo apt update && sudo apt upgrade -y
sudo apt dist-upgrade -y
Resolving Library Issues and Installing Additional Packages:
During the installation, I encountered popup messages about services running outdated libraries.
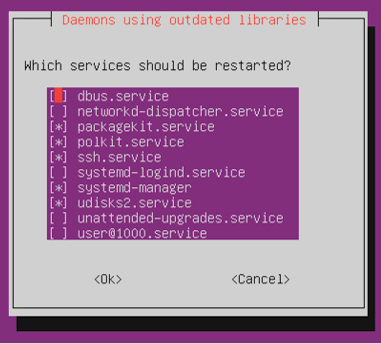
I chose not to restart any services immediately and continued installing essential packages, including zip, unzip, and jq:
sudo apt install zip unzip
sudo apt install jq
sudo apt install apt-transport-https
After completing the package installations, I rebooted the server to reload the services.
Connecting via SSH and Configuring Elastic Stack:
Using the PuTTY client on my Windows machine, I connected to the server using the server’s IP address obtained with the command:
ip a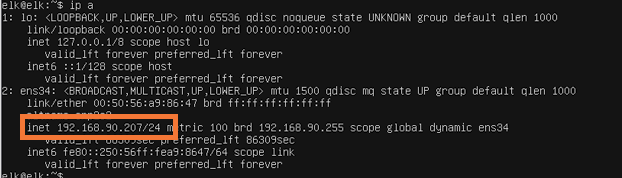
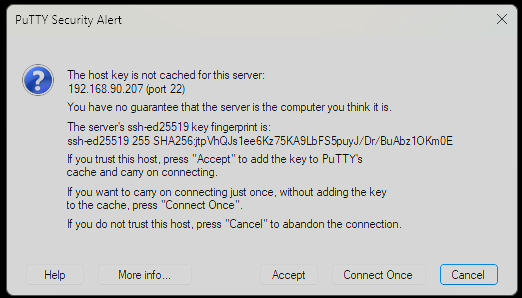
For SSH on PuTTY, put the IP address of the server in the host name or IP address box, everything else should default to the correct value with the SSH radio button. When you hit enter, you’ll get a security alert popup.
Add elastic GPT key to the key ring and add its source to the trusted sources and run apt update to enable the new source.
curl -fsSL https://artifacts.elastic.co/GPG-KEY-elasticsearch | sudo gpg --dearmor -o /usr/share/keyrings/elastic.gpg

echo "deb [signed-by=/usr/share/keyrings/elastic.gpg] https://artifacts.elastic.co/packages/7.x/apt stable main" | sudo tee -a /etc/apt/sources.list.d/elastic-7.x.list

sudo apt update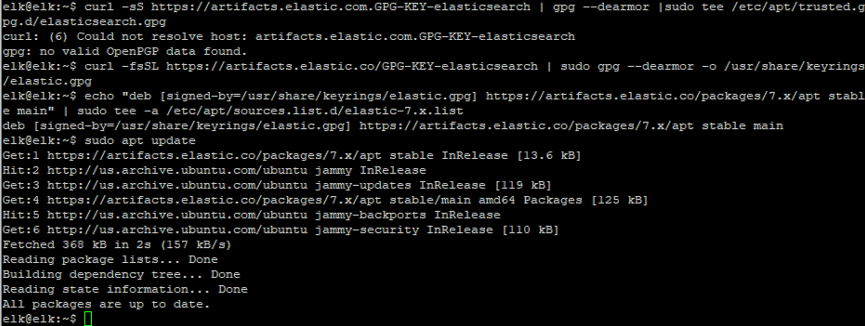
Next, I proceeded with installing and configuring Elastic Stack components:
Elasticsearch:
sudo apt install elasticsearch
sudo systemctl status elasticsearch.service
Next I modified the elastic configuration file. The network host will be the IP address of the server.
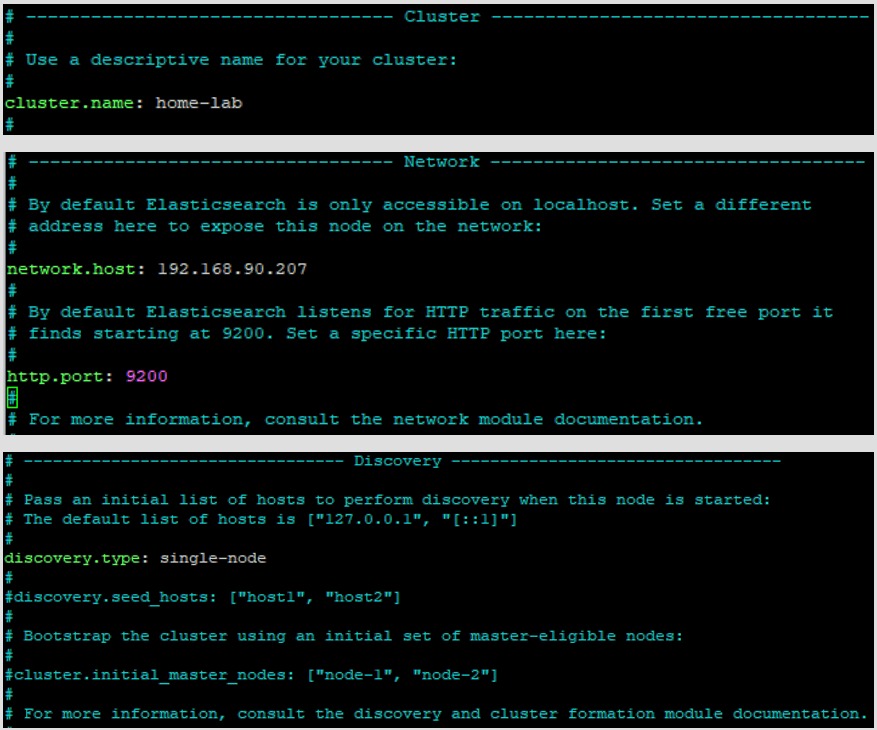
sudo nano /etc/elasticsearch/elasticsearch.ymlIn the elasticsearch.yml file, uncomment the cluster.name line and add a name for you cluster. Uncomment the network host line and add in your machine’s IP address. Uncomment out the http.port line. and add a line in the discovery section with the text “discovery.type: single-node”.
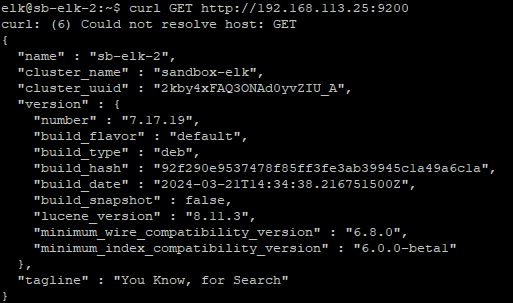
Next, start and enable the elasticsearch.service. You can test that everything is working properly by sending a GET request with curl.
sudo systemctl start elasticsearch && sudo systemctl enable elasticsearch

curl GET http://<server_ip>:9200
The curl command should show a similar out put to the below image and include the tagline “You Know, for Search”
Kibana:
sudo apt install kibanaEdit the Kibana configuration file.
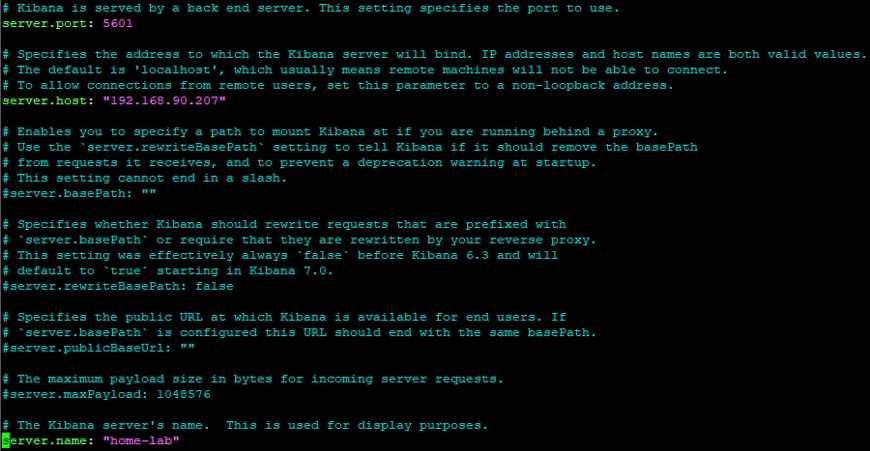
sudo nano /etc/kibana/kibana.ymlIn the kibana.yml file, uncomment the server.port line. Uncomment the server.host line and replace “localhost” with your IP address. Finally, uncomment server.name and replace “your-hostname” with your own.
Start and enable the Kibana service, and restart the elasticsearch service.
sudo systemctl start kibana && sudo systemctl enable kibana && sudo systemctl restart elasticsearch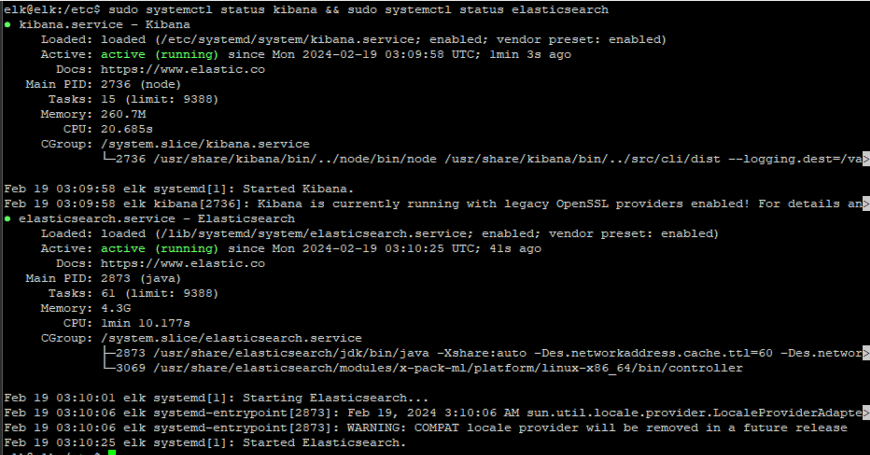
Logstash:
sudo apt install logstash
sudo systemctl start logstash && sudo systemctl enable logstash
Filebeat:
sudo apt install filebeatEdit the filebeat configuration.
sudo nano /etc/filebeat/filebeat.ymlIn the filbeat.yaml file, replace “localhost” with your server’s IP address.
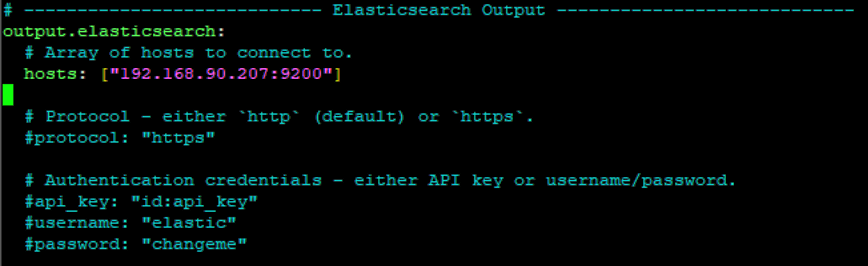
Setup filebeat:
sudo filebeat setup --index-management -E output.logstash.enabled=false 'output.elasticsearch.hosts=["192.168.90.207:9200"]' Test that filebeat is working with a GET Request
curl GET http://<server_ip>:9200/_cat/indices?v 
Certificate Management:
Certificates are crucial for securing the Elastic Stack components. The following commands generate and move the necessary certificates:
First, navigate to /usr/share/elasticsearch and create a new file named instances.yml and add the following below.
instances:
    - name: "elasticsearch"
    ip:
      - "Your machine's IP address"
      - name: "kibana"
    ip:
      - "Your machine's IP address"
      - name: "logstash"
    ip:
      - "Your machine's IP address"
      - name: "fleet"
    ip:
      - "Your machine's IP address"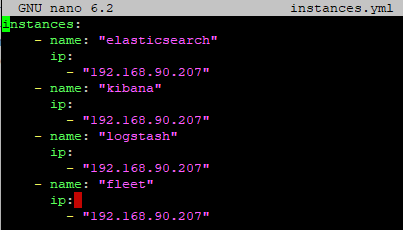
Next, we’ll set up a Public Key Infrastructure (PKI) certificate authority.
sudo /usr/share/elasticsearch/bin/elasticsearch-certutil ca --pem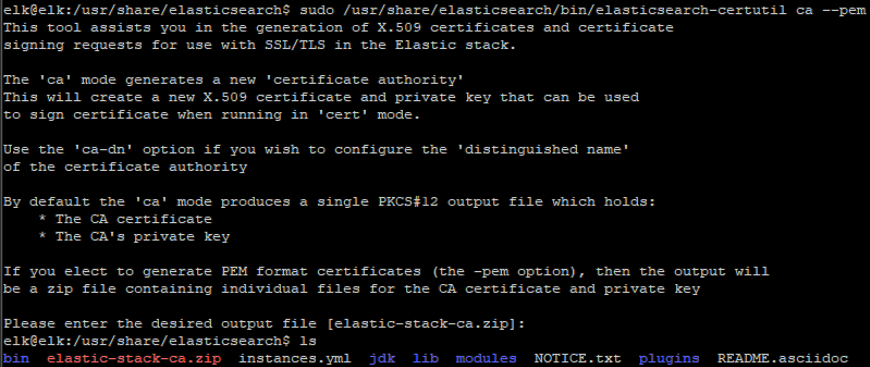
Now unzip the file.
sudo unzip ./elastic-stack-ca.zipNext we’ll generate and sign some certificates using the instances.yml file we created.
sudo /usr/share/elasticsearch/bin/elasticsearch-certutil cert --ca-cert ca/ca.crt --ca-key ca/ca.key --pem --in instances.yml --out certs.zip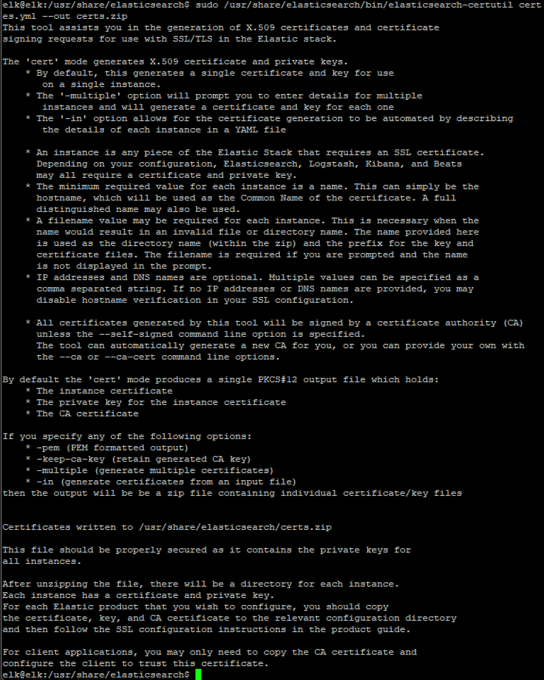
Now unzip the certs, make a directory and move them all of the certs into the new directory.
sudo unzip certs.zip
sudo mkdir certs
sudo mv /usr/share/elasticsearch/elasticsearch/* certs/ && sudo mv /usr/share/elasticsearch/kibana/* certs/ && sudo mv /usr/share/elasticsearch/logstash/* certs/ && sudo mv /usr/share/elasticsearch/fleet/* certs/

Make new directories that will be the final home for these files.
sudo mkdir -p /etc/kibana/certs/ca && sudo mkdir -p /etc/elasticsearch/certs/ca && sudo mkdir -p /etc/logstash/certs/ca && sudo mkdir -p /etc/fleet/certs/caCopy the certificate into each new directory.
sudo cp ca/ca.* /etc/kibana/certs/ca && sudo cp ca/ca.* /etc/elasticsearch/certs/ca && sudo cp ca/ca.* /etc/logstash/certs/ca && sudo cp ca/ca.* /etc/fleet/certs/caCopy all of the service specific files into their respective directories, put a copy of the public certificate in the root directory, and clean up the directory.
sudo cp certs/elasticsearch.* /etc/elasticsearch/certs/ && sudo cp certs/kibana.* /etc/kibana/certs/ && sudo cp certs/logstash.* /etc/logstash/certs/ && sudo cp certs/fleet.* /etc/fleet/certs/
sudo cp ca/ca.crt /
sudo rm -r elasticsearch/ kibana/ fleet/ logstash/
Permissions
In this step, we will grant ownership to the elasticsearch for its respective files.
cd /usr/share
sudo chown -R elasticsearch:elasticsearch elasticsearch/
sudo chown -R elasticsearch:elasticsearch /etc/elasticsearch/certs/ca
We can also test out our certificates with openssl.
sudo openssl x509 -in /etc/elasticsearch/certs/elasticsearch.crt -text -noout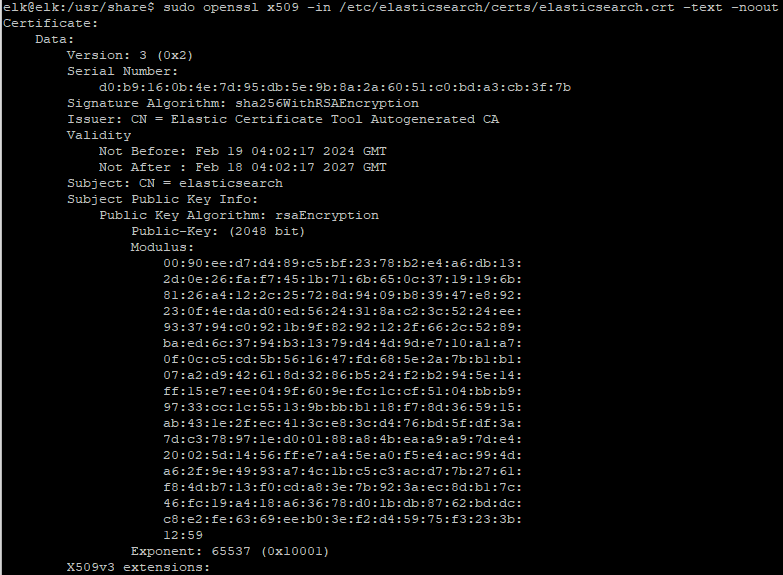
Configurations
Now edit the configuration in the Kibana YML file.
sudo nano /etc/kibana/kibana.ymlAdd the following lines to the end of the file. Make sure to put in your IP address:
server.ssl.enabled: true
server.ssl.certificate: "/etc/kibana/certs/kibana.crt"
server.ssl.key: "/etc/kibana/certs/kibana.key"

elasticsearch.hosts: ["https://<<your IP>>:9200"]
elasticsearch.ssl.certificateAuthorities: ["/etc/kibana/certs/ca/ca.crt"]
elasticsearch.ssl.certificate: "/etc/kibana/certs/kibana.crt"
elasticsearch.ssl.key: "/etc/kibana/certs/kibana.key"

server.publicBaseUrl: "https://<<your IP>>:5601"

xpack.security.enabled: true
xpack.security.session.idleTimeout: "30m"
xpack.encryptedSavedObjects.encryptionKey: "SomeReallyReallyLongEncryptionKey" 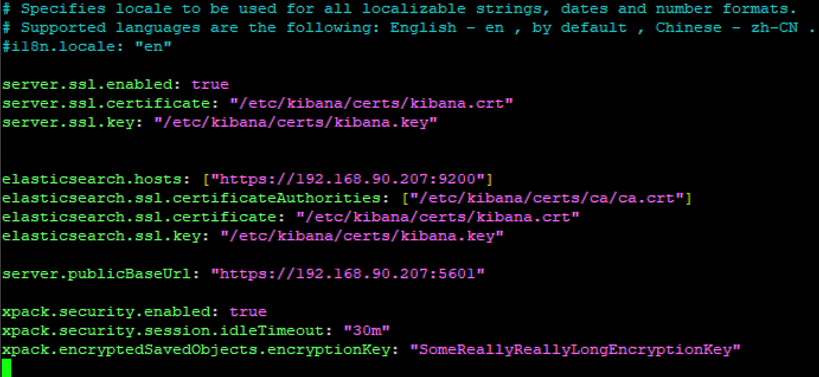
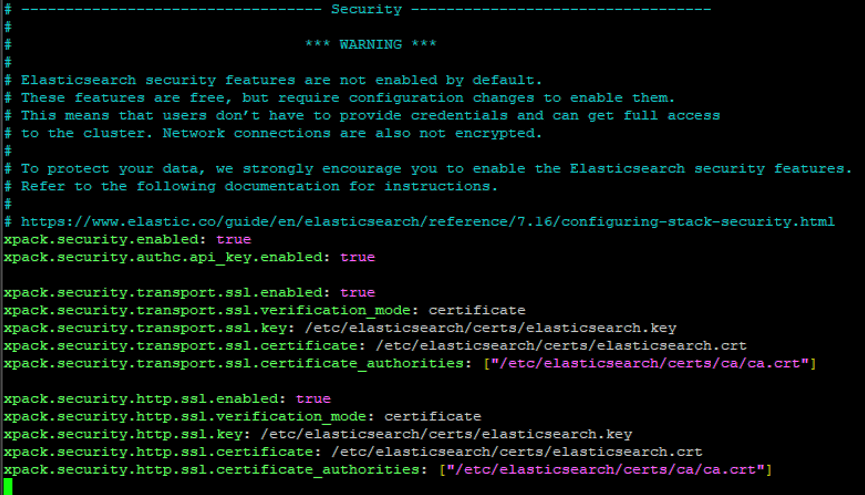
Next edit the configuration in the Elasticsearch YML file.
sudo nano /etc/elasticsearch/elasticsearch.ymlAdd the following lines to the end of the file:
xpack.security.enabled: true
xpack.security.authc.api_key.enabled: true

xpack.security.transport.ssl.enabled: true
xpack.security.transport.ssl.verification_mode: certificate
xpack.security.transport.ssl.key: /etc/elasticsearch/certs/elasticsearch.key
xpack.security.transport.ssl.certificate: /etc/elasticsearch/certs/elasticsearch.crt
xpack.security.transport.ssl.certificate_authorities: ["/etc/elasticsearch/certs/ca/ca.crt"]

xpack.security.http.ssl.enabled: true
xpack.security.http.ssl.verification_mode: certificate
xpack.security.http.ssl.key: /etc/elasticsearch/certs/elasticsearch.key
xpack.security.http.ssl.certificate: /etc/elasticsearch/certs/elasticsearch.crt
xpack.security.http.ssl.certificate_authorities: ["/etc/elasticsearch/certs/ca/ca.crt"]
Now restart the services and check their status.
sudo systemctl restart elasticsearch && sudo systemctl restart kibana
sudo systemctl status elasticsearch
sudo systemctl status kibana
We can test the HTTPS with another GET. Using a standard request will give us a certificate error.
curl -XGET https://192.168.90.207:9200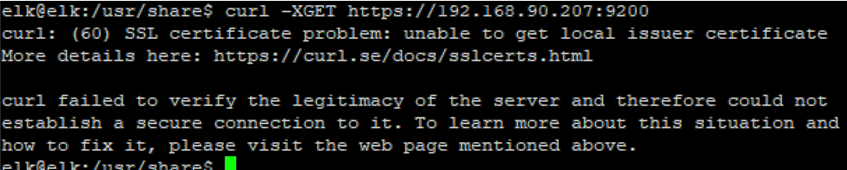
Using an “insecure” flag bypasses this, but has another error.
curl -XGET https://192.168.90.207:9200 --insecure
We need to use both the insecure flag and parse the JSON by piping the output into jq.
curl -XGET https://192.168.90.207:9200 –insecure | jq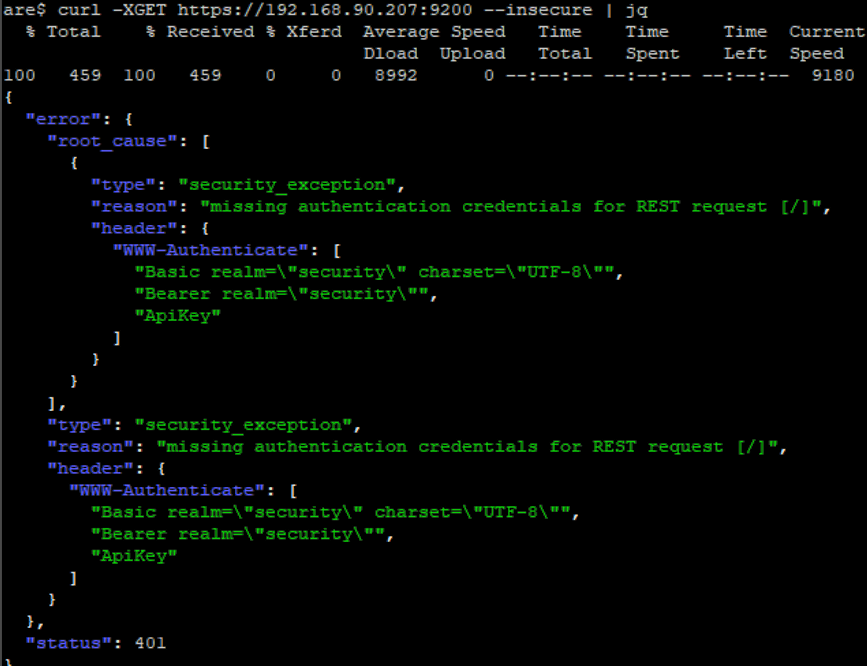
This shows us that the API is working, but we still have issues with missing credentials.
Password Generation
Now we are going to generate some password for service accounts.
sudo /usr/share/elasticsearch/bin/elasticsearch-setup-passwords autoThis will generate passwords that will only display once, so make sure to store them in a secure place. They will be formatted like this:
Changed password for user apm_system
PASSWORD apm_system = <Password>
Changed password for user kibana_system
PASSWORD kibana_system = <Password>
Changed password for user kibana
PASSWORD kibana = <Password>
Changed password for user logstash_system
PASSWORD logstash_system = <Password>
Changed password for user beats_system
PASSWORD beats_system = <Password>
Changed password for user remote_monitoring_user
PASSWORD remote_monitoring_user = <Password>
Changed password for user elastic
PASSWORD elastic = <Password>
Now we’ll add the kibana_system password into the kibana.yml file under elasticsearch.password.
sudo nano /etc/kibana/kibana.yml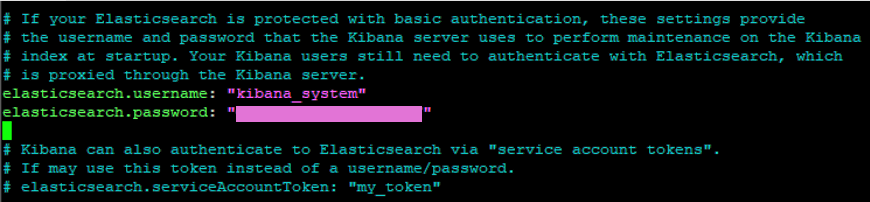
And restart the services.
sudo systemctl restart kibana && sudo systemctl restart elasticsearchNow we’ll navigate to the web browser and point it to the IP and port. https:// <<IP Address>> :5601. I ran into an issue from testing it with http earlier in the process. You should get a login screen like the one below. The user name is elastic, and the “elastic” password that was auto generated previously.
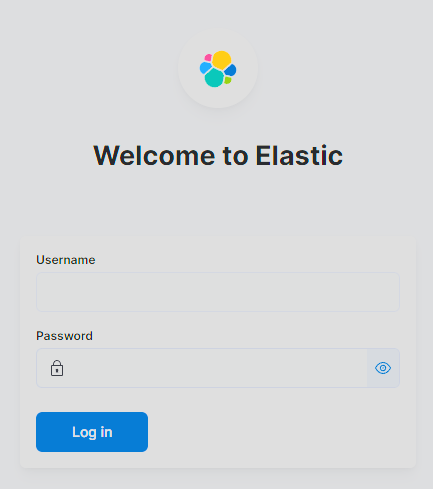
The user name is elastic, and the password is the one that was auto generated previously.
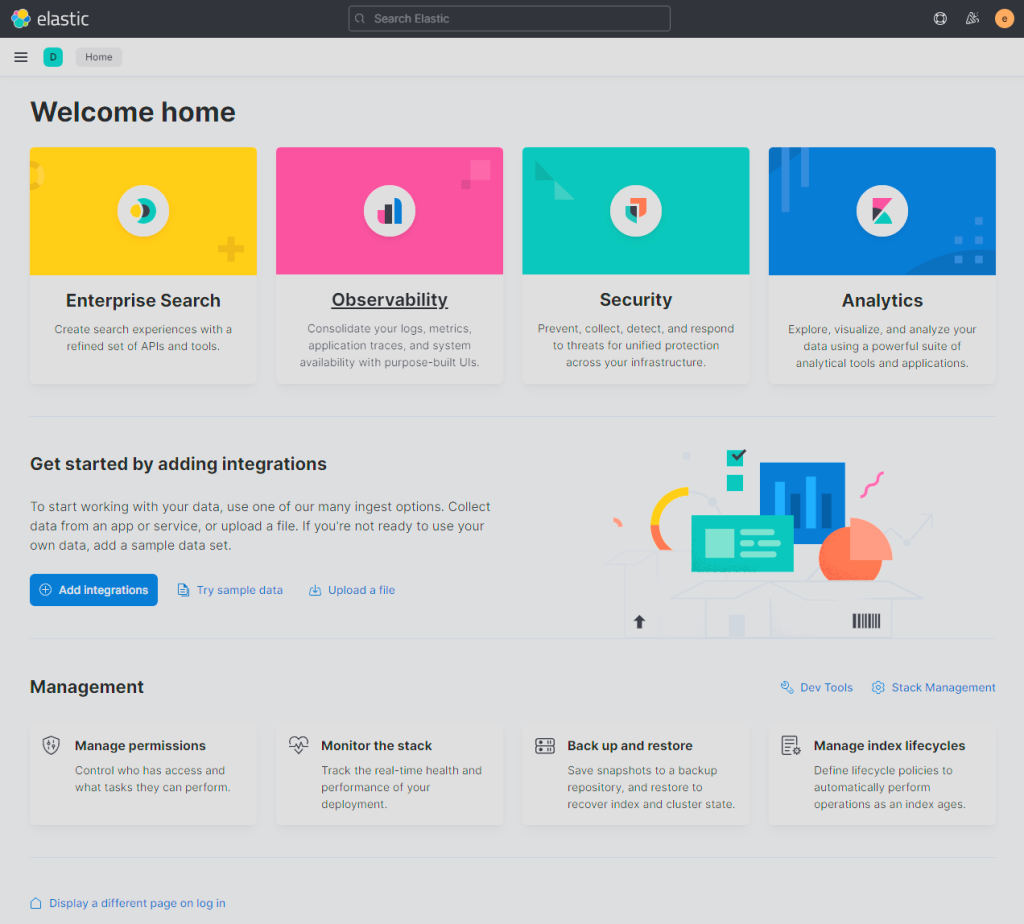
Congratulations! You’ve successfully installed and configured the Elastic Stack on your local VM. This setup provides a foundation for data analytics and visualization. Well use this as a baseline to begin building a homebrew SIEM. For more insights and advanced configurations, refer to Elastic’s official documentation and explore additional plugins and features within the Elastic Stack.


Leave a comment